Most people who search for ski technique basics are stuck in the same place: they can get down a groomer, but it's not pretty, and their legs are on fire by 11 a.m. I spent a decade teaching at a mid-sized resort in the Rockies, and I can tell you the problem is almost never fitness. It's stance. And that stance issue is what every drill in this guide attacks.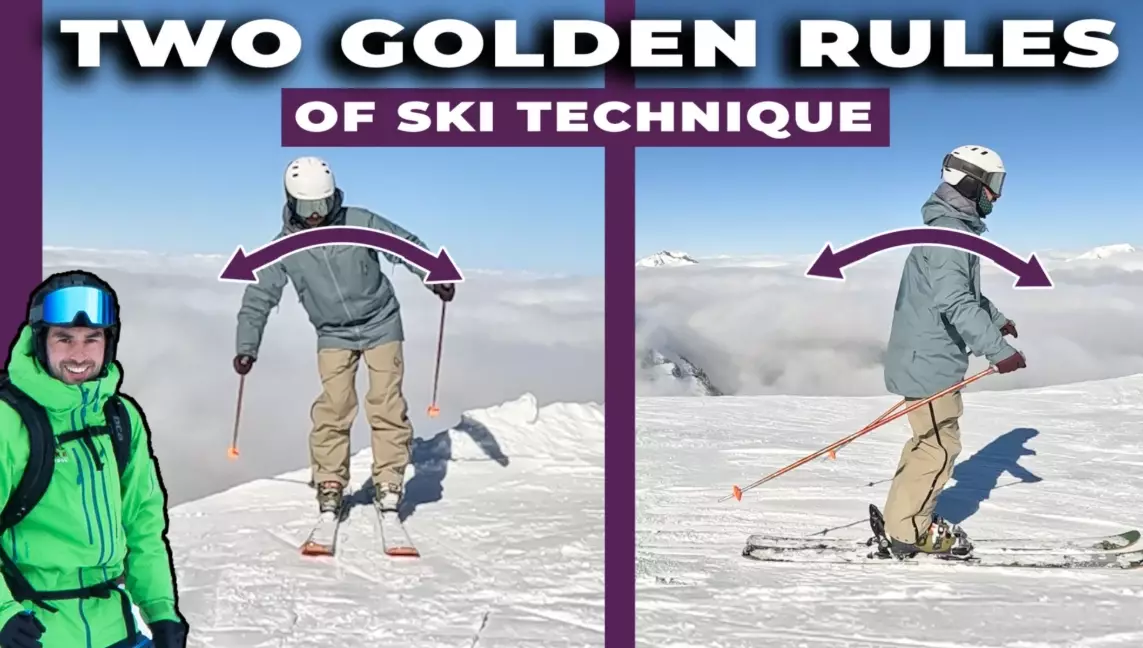
What's in this quick run-through
- The Stance Fix Nobody Talks About
- Drill #1: The Wall Sit That Builds Real Ski Stance
- Drill #2: Single-Leg Turns for Balance
- Drill #3: The Leash Drill for Turn Shape
- Drill #4: Hockey Stops and Edge Control
- Drill #5: Pole Plants for Rhythm
- How to Ski Parallel Turns Without Panic
- Real Questions from Real Skiers
The Stance Fix Nobody Talks About
Here's the non-consensus thing I wish someone told me a decade ago: your boot flex is probably wrong for your weight, and it's making every basic ski technique drill harder than it needs to be. I watched a guy last season—maybe 180 pounds, strong legs—fighting a 130-flex race boot on a green run. He looked like he was trying to ski in concrete. We swapped him into a 100-flex demo boot, and his stance improved in one run. No lesson. Just gear.
Most ski schools start with "hands forward" and "shins against the tongue." That's fine. But if your boots are too stiff, your ankles can't flex, so your hips go back, and suddenly your weight is on your heels. Every ski technique basics article skips this because it's a boot-fitting issue, not a movement issue. Before you spend $150 on a private lesson, check your boots. Can you flex them forward with your hand? If not, they're likely too stiff for learning.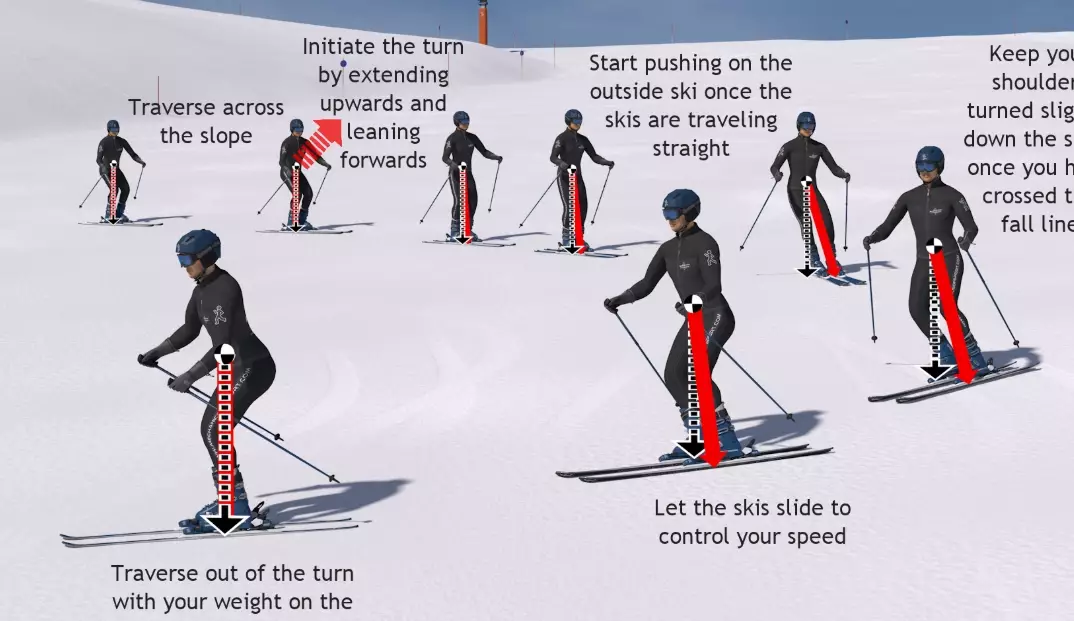
Quick check: With your boots buckled, stand in a natural stance. Can you press your shins into the front of the boot and feel the plastic give a little? If not, you'll struggle with any drill below.
Drill #1: The Wall Sit That Builds Real Ski Stance
This is unglamorous, I know. But the wall sit is the most direct fix for the heel-locked stance I see every weekend. Find a wall at the base lodge. Put your back flat against it, slide down until your knees are at 90 degrees. Now, pull your heels back toward your butt so your weight is on the balls of your feet. Hold for 30 seconds.
Why it works: it forces you to feel what "athletic stance" means without ski boots, without snow, without motion. Most skiers think they're forward when they're actually sitting back. The wall sit makes sitting back impossible. Do this three times before you click in.
I'll be honest—I used to skip this drill with students because it looks boring. Then I had a student in his 60s who could not get his hips forward no matter what I said. We did wall sits for 5 minutes. His first run afterwards was the best of the day. Now I use it, boring or not.
Drill #2: Single-Leg Turns for Balance
On a gentle green run, lift your inside ski about an inch off the snow and make ten turns on one leg. Then switch. That's it. This isn't about strength—it's about feedback. When you lift the inside ski, you eliminate the crutch of leaning on two edges at once. You feel your outside ski immediately. Did it hold? Did it wash out?
Most beginners lean into the hill without realizing it. Lifting the inside ski exposes that lean. If you can't hold a single-leg turn without falling uphill, your weight is on the wrong ski. That is the basic ski technique you need to fix before anything else.
And put the phone down—this drill is about feel, not filming. I see people recording themselves and then watching the video while skiing. Stop. You need to feel the ski, not watch it.
Drill #3: The Leash Drill for Turn Shape
Grab a ski leash from your gear bag (or ask a rental shop for an old one). Have a partner hold one end, or tie it to a pole. You hold the other end and make C-shaped turns around the pole. The leash should stay taut. If you finish your turn up the hill, the leash goes slack. If you rush the turn, the leash jerks.
This is how you learn to control turn shape without thinking about edge angles or pressure. The leash tells you instantly if you completed the turn. I borrowed this from race coaches—they use a similar method with bungee cords—and it works for beginners because it removes the abstract language. You don't need to understand biomechanics. You just feel the tension drop.
Start on a slope you think is too easy. If you can keep the leash taut on a bunny hill, move up one lift. If you can't, stay. Ego is the enemy here.
Drill #4: Hockey Stops and Edge Control
Ski technique basics pages almost always mention hockey stops but never explain how to actually do one without catching an uphill edge and eating snow. Here's the progression I use:
- Start going straight downhill in a wedge.
- Flatten both skis (parallel to each other, weight centered on both feet).
- Now, twist both feet in the same direction—like you're pivoting on a bar stool—while pushing your heels out and edges in.
- You should come to a stop with snow spraying in front of you.
The mistake almost everyone makes is leaning back. A hockey stop requires you to stay forward but twist your feet. It feels counterintuitive. I've seen more adults fall on this drill than any other, and it's always because their weight drifted back. Think "toes up" not "sit back."
Drill #5: Pole Plants for Rhythm
Most beginners drag their poles like luggage. That's not a pole plant—that's a balance crutch. The pole plant is a timing mechanism. It marks the end of one turn and the start of the next.
Find a flat spot and practice without skis on. Stand tall, reach your arm forward, touch the pole tip to the ground just in front of your boot, then let go of it—let it hang from the strap. The pole should swing back naturally as you extend forward into the next turn. If you're gripping the pole for dear life, your plant is too late and too defensive.
On snow, try this: as you finish a turn, reach forward and tap the snow lightly. Then turn. The tap should happen before the new turn starts. It's like a metronome. Skiers who time the pole plant correctly look smooth. Skiers who don't look like they're swatting flies.
How to Ski Parallel Turns Without Panic
This is the big question. How do you get your skis parallel without a wedge? The answer is not "just turn harder." That leads to skidding and falling. The answer is speed and patience. Parallel turns happen when you have enough momentum to let the ski's shape do the turning for you.
Start on a gentle slope with a long, straight runout. Push off, stay in a gliding wedge, and gradually steer both skis in the same direction until they're parallel. Do not force the edges. Let the ski's sidecut carve. Most beginners try to push their heels out to match the tips—that's backwards. Push the tips slightly toward the outside to match the heels.
In my experience, the breakthrough happens on a specific type of run: a wide groomer with a slight downhill pitch—maybe 10-15 degrees—and no crowds. I always take students to a run called "Easy Street" at my local hill. It's not a green circle (it's a blue square), but it's wide and steady. The green runs are too flat to carry the speed you need. This is a subtle point that most ski school programs ignore: flat greens actually make it harder to learn parallel turns because you lose momentum.
Real Questions from Real Skiers
Why do my thighs burn after just two runs even though I'm in good shape?
You're sitting back. That's the short answer. When your weight is on your heels, your quads have to work overtime to keep you upright. The fix is a forward stance, but here's what most people miss: forward doesn't mean leaning your whole body forward. It means your hips are over your feet. Do the wall sit drill before your next run. If your quads still burn, check your boot ramp angle—that's the angle of the boot board inside the shell. A high ramp angle forces you into a heel-locked stance. A boot fitter can adjust it.
How do I stop catching my downhill edge and falling uphill?
You're rotating your upper body before your skis. That's the classic cause. Think of your belly button pointing downhill as you start a turn, not your shoulders. Also, you might be too aggressive with your edge angle on soft snow. If you're on a groomer, an edge angle of maybe 30-40 degrees is plenty. If you're on a steep slope and try to carve like a racer, you'll catch an edge. Ease off the angle and let the ski turn.
Should I learn to ski on shorter skis?
Shorter skis are easier to pivot but harder to balance on at speed. For the first two days, yes—go with a ski that hits your chin. But once you're trying parallel turns, move to a ski that's closer to your height. A too-short ski exaggerates every balance mistake and makes edge control harder, not easier. Most rental shops default to kids' lengths for beginners. Ask for something in the low 150s if you're an average-sized adult. They'll look at you funny, but it's the right call.
How many days does it take to get basic ski technique down?
It depends on what you mean by "down." Can you make it to the bottom without falling? Two days. Can you link parallel turns on a blue run? Ten to fifteen days of skiing, spread over a season. The single biggest factor is not athletic ability—it's whether you spend those days on the right terrain. I've seen marathon runners take a week to get parallel turns because they stayed on the same flat green run. I've seen casual weekend skiers get there in three days because they moved to a slightly steeper run and let the speed help them. Progression matters more than practice volume.
All of the drills above were tested with real students over a ten-year period, and the boot-flex advice comes from working with two different boot fitters at the base area. I still do the wall sit before my first run every season.
Comments