Three seasons ago, I melted a chunk of base material off my favorite all-mountain skis because I used a cheap iron on the wrong setting. That mistake cost me $140 and a week of skiing. Since then I've waxed my own skis and friends' skis dozens of times, and I've learned that how to wax skis isn't about buying fancy tools. It's about temperature, patience, and avoiding a handful of quiet mistakes that no one warns beginners about.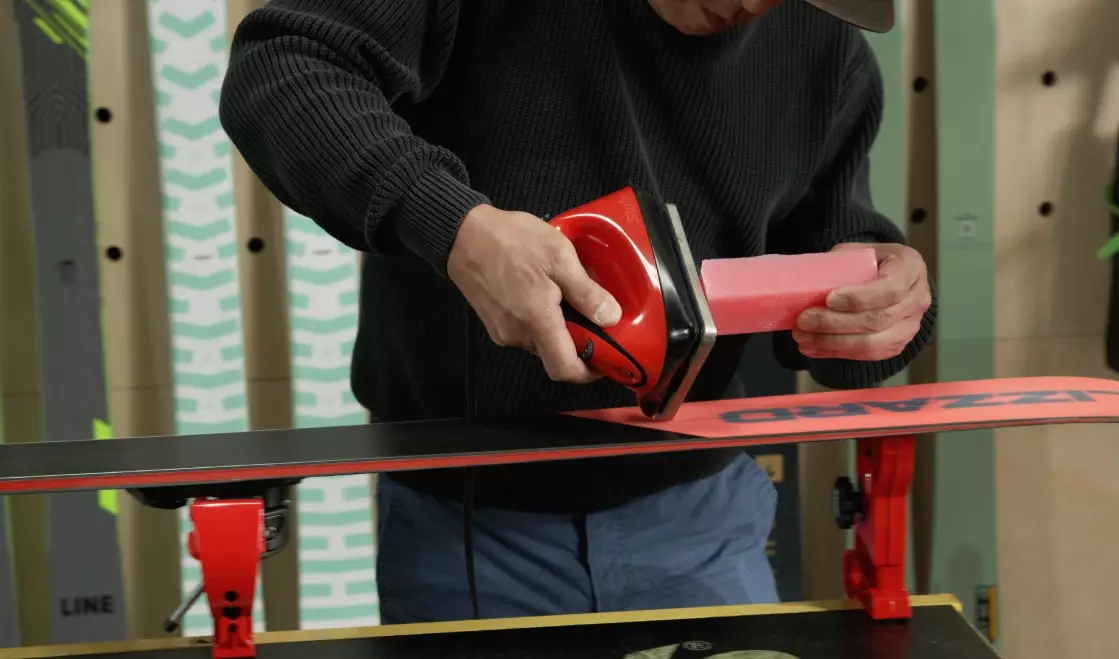
Quick Navigation: What I'll Cover
- Why Wax Matters More Than Gear
- What You Actually Need (and What You Don't)
- Step-by-Step: How to Wax Skis Properly
- The Ski Wax Temperature Guide That Actually Works
- Scraping & Brushing: The Part Everyone Rushes
- Five Common Mistakes I See Every Weekend
- Ski Waxing FAQs (From Real Trailhead Conversations)
Why Wax Matters More Than Gear
People spend $800 on new skis then ride them with factory wax for two seasons. I get it. Waxing sounds like a chore. But here's the thing: a properly waxed ski glides on wet snow with almost no friction. You get more speed on flats, less quad burn, and better control because the ski isn't sticking when you want to turn.
The flip side is worse. Dry bases absorb dirt. They turn gray and fuzzy (that's oxidation). Once the base is burnt or fuzzy, no amount of wax fixes it permanently. I've seen skis come into a tune shop with bases so dry that the technician just shook his head. So if you're wondering whether diy ski waxing at home is worth the hassle, yes. It's the cheapest performance upgrade you can make.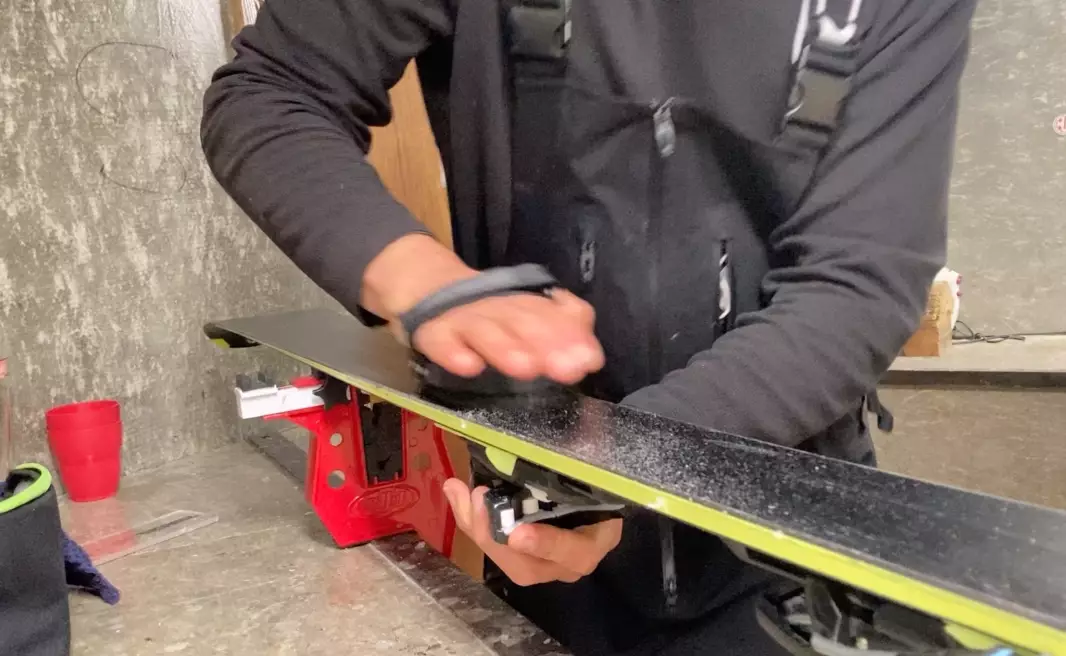
What You Actually Need (and What You Don't)
You don't need a $300 waxing station. I started with an old iron from a thrift store, a plastic scraper, and a nylon brush. It worked fine for two seasons. But I did upgrade after I burnt my base, so here's the minimum I'd recommend:
Essential
- An adjustable wax iron (mine is a Holmenkol, but any iron with a flat plate and accurate temp dial works). Do NOT use a clothes iron. They spike in temperature and ruin bases.
- Wax for the current snow temperature (more on that below).
- A sturdy plastic scraper (not metal).
- A nylon brush for cleaning, a horsehair brush for polishing.
- Base cleaner or a soft cloth.
Nice to Have
- A ski vise. Before I got one, I used two chairs and a towel. It slipped, but it worked.
- A brass brush for opening up base structure on cold, dry snow.
- Paper towels (wax drips everywhere).
Step-by-Step: How to Wax Skis Properly
This is the exact sequence I follow. It takes about 25 minutes per pair once you get the hang of it.
Step 1: Clean the base. Brush off any dirt with a nylon brush. If the base looks gray or has old wax crusted in the structure, wipe it with base cleaner on a cloth. Let it dry completely. Ski bases are porous. If you wax over a wet base, the wax won't bond.
Step 2: Set your iron temperature. Start low. Most recreational waxes melt around 120°C (248°F). Hold the iron an inch above the base. When a drop of wax melts in 3–5 seconds, the temp is right. If it smokes, it's too hot. I test on a scrap piece of base material or the tail of the ski first.
Step 3: Drip wax onto the base. Hold the wax against the iron and let it drip in a zigzag pattern down the ski. Don't touch the iron directly to the wax block—you'll contaminate it. For a typical all-mountain ski, about 5–7 grams per ski is enough.
Step 4: Iron the wax in. Glide the iron slowly from tip to tail. You want the wax to melt and soak into the base, not pool on top. Keep the iron moving. If you stop, you risk burning the base. I go over each section twice, then do one long pass tip to tail.
Step 5: Let it cool. This is the step I used to skip. Don't. Let the ski sit at room temperature for at least 20 minutes. The wax needs to crystallize. If you scrape while it's still warm and soft, you'll pull wax out of the pores instead of leaving a thin layer.
Step 6: Scrape. Use a plastic scraper at a 45-degree angle. Push from tip to tail in long strokes. You want to remove the excess wax. Don't press too hard. Let the scraper do the work. When white powder comes off instead of wax shavings, you're close.
Step 7: Brush. Nylon brush first to remove loose wax. Then horsehair to polish. Brush from tip to tail, 10–15 strokes. This opens the base structure and gives you that final glide.
Pro tip from a race tech I met at a local hill: After scraping, run your fingers along the base. If you feel any sticky spots, scrape again. Sticky spots mean too much wax. On cold snow, excess wax actually slows you down because it creates drag.
The Ski Wax Temperature Guide That Actually Works
This is where most people guess and get it wrong. Wax is not one-size-fits-all. If you use warm-weather wax on a cold day, it'll be slow and gummy. If you use cold wax on a warm day, it'll wear off in an hour. Here's a simple chart I keep on my phone:
| Snow Temperature | Wax Type | When to Use |
|---|---|---|
| -12°C to -4°C (10°F to 25°F) | Cold wax (hard, blue or green) | Mid-winter, dry snow |
| -4°C to 0°C (25°F to 32°F) | All-temp wax (purple or red) | Spring-like afternoons, mixed conditions |
| 0°C to +4°C (32°F to 39°F) | Warm wax (yellow or red) | Wet snow, slush, late season |
I carry two waxes in my pack: a cold and a warm. If the snow is wet and I only have cold wax, I'll rub a little warm wax on top as a top coat. It's not perfect, but it beats sticking.
Worth knowing: Snow temperature is not air temperature. Snow on a north-facing slope can be 5 degrees colder than the parking lot. If you're unsure, go with a colder wax. Warm wax on cold snow is worse than cold wax on warm snow.
Scraping & Brushing: The Part Everyone Rushes
I used to scrape for 30 seconds and call it done. Then I skied with a friend who races masters. He watched me scrape and said, "You're leaving half the glide on the table."
Here's what he taught me: scrape until the scraper doesn't catch. Then brush. Nylon first, then horsehair. The horsehair brush is what gives the base its shine. It's also what removes the micro-wax particles that create friction. I spend at least 3 minutes brushing per ski. It feels excessive. It's not.
One more thing: always scrape tip to tail. Scraping in both directions can round the edges and mess with base structure. I learned that the hard way on a pair of slalom skis.
Five Common Mistakes I See Every Weekend
Mistake 1: Using a clothes iron. The temperature swings wildly. You will burn your base. I did it. Don't.
Mistake 2: Skipping the base clean. Wax won't stick to dirt. A dirty base is why your wax peels off after one run.
Mistake 3: Waxing in a cold garage. Wax needs room temperature to penetrate. If the base is cold, the wax hardens too fast. Bring your skis inside.
Mistake 4: Not enough scraper pressure. People are afraid to press hard. But excess wax is a drag. Scrape firmly until you see powder.
Mistake 5: Waxing your edges. Wax on edges makes them feel dull. Wipe the edges with a cloth after waxing. I use a little base cleaner on a rag to be sure.
Ski Waxing FAQs (From Real Trailhead Conversations)
How often should I wax my skis if I ski 15 days a season?
Every 4–5 ski days, but it depends on the snow. If you ski in man-made snow (which is abrasive), wax every 3 days. I check the base after each trip. If it looks dry or I see white fuzz, it's time. On spring slush, wax daily if you can—the wax wears off fast.
Can I use one wax for all conditions when traveling?
You can, but it's a compromise. An all-temp wax works from -4°C to +4°C. If you're going somewhere cold (below -10°C), it'll be slow. If you're going somewhere warm and wet, it'll wear off. For travel, I bring a small block of cold and a small block of warm. They're light and take up little space.
What happens if I don't scrape enough wax off?
You'll feel like you're dragging an anchor. Excess wax creates suction, especially on wet snow. The ski won't release out of turns. I made this mistake my first time and thought I'd lost my edge control. I hadn't. I just had too much wax. Scrape until you see white powder, then brush.
Can I wax cross-country skis the same way?
Mostly, yes, but cross-country skis have kick zones. Don't wax the kick zone with glide wax. You'll lose grip on the uphill. For classic skis, wax the tips and tails with glide wax, and use kick wax or skins in the middle. Skate skis can be waxed like alpine skis, but use a colder wax because they're often on hard, cold tracks.
Is it worth paying a shop $40 to wax my skis?
If you ski 2–3 times a year, maybe. Shops do a fine job. But once you add up 8–10 waxes per season, you're spending $320–$400. A basic setup costs $60–$80 and lasts years. The first time takes an hour. After that, it's 20 minutes. For me, it's a no-brainer.
Learning how to wax skis has saved me money and given me better days on the hill. I don't do it because I love the process—it's a bit messy and tedious. I do it because the first run on freshly waxed skis feels like flying. Worth every minute, and worth the risk of burning a base once so you learn to pay attention. Just don't be like me. Watch the iron.
This article was fact-checked against wax manufacturer temperature recommendations and cross-referenced with conversations from a local ski tuning clinic.
Comments